High Availability for AWS VPC NAT instances


The Background

Amazon offers VPC for creating a secured private network space, to host and run their Servers. In AWS VPC, you can create public & private subnets. Public subnets are used to host the Internet facing servers (mostly web / application servers) that you want inbound internet traffic allowed to and private subnets for backend instances (mostly Database servers) that you do not want to be directly addressable from the Internet. These DB Servers would still need access to internet for their updates and any other Interfacing that may need to be made to the internet. This is possible by routing the traffic through a mediating instance called the NAT instance (Network Address Translation instance). This mediator will need to be launched in the public subnet with Elastic IP and has to and from internet access. It simply performs the Network Address Translation and acts as a gateway to internet for the private subnet.

While this being the case, if the connectivity of Internet from private subnet becomes a critical factor, then there is a need to design High Availability for the same.

This blog is for those who are wondering what would happen when the NAT instance associated with the private subnet of their  VPC, to allow outbound internet access fails.

Yes folks, there is a way by which you can overcome this by having not one but 2 NAT instances and leverage bidirectional monitoring between those two NAT instances to implement a high availability (HA) failover solution for network address translation (NAT).

For those who are new to this maze of services, worry not! The following paragraphs will take you through the process with ease.

This image would exactly depict the above said.

NAT with no HA

Now comes a potential failure situation. What if the single NAT instance that you launched to allow outbound internet access for the instances in your private subnet fails or crashes ?

NAT on Failure

The prevention scenario would be to have not one but rather two NAT instances, each monitoring each other and leveraging their purpose thereby offering high availability.

NAT HA

Ok, so you have decided to take the preventive step, let us go through the requirements and then the tasks for the same.

What you will need –
  1. An Amazon VPC.
  2. 2 Linux Amazon EC2 NAT instances.
  3. Any number of instances that you would want to have in the private and public subnets.
  4. EIPs (Elastic IPs) for the instances in the public subnet.
  5. Route tables that would allow the NAT instances to act as mediators.
  6. A shell script that you will download from here for the configuration.

Now let’s go through each of the step and get this up and working.

Step 1: Creation of an Amazon VPC.

What you need here is a VPC with one public subnet only. Once you create this, add 3 more subnets of your choice one in the same AZ as the subnet that came along with the VPC creation and the other two in a different AZ.

If you are new to this, or you don’t really get a complete picture of how to go about it, worry not! We have for you, an exclusive step by step procedure to do this at Appendix A.

Before we launch our NAT instances, let us create a security group for the same. A typical NAT instance must allow inbound SSH traffic from the private subnet (or the entire VPC) and outbound HTTP/HTTPS (or ALL traffic) traffic to the internet.

Check out Appendix B for a detailed explanation on creation of a security group for the NAT instances that you would be launching.

Step 2 – Setting up an IAM role:

What is needed next is an EC2 role that will grant your NAT instances permissions to take over routing when the other NAT instance fails.

So create a role and simply add this script to the policy document and hit save!

{
“Statement”: [
{
“Action”: [
“ec2:DescribeInstances”,
“ec2:CreateRoute”,
“ec2:ReplaceRoute”,
“ec2:StartInstances”,
“ec2:StopInstances”
],
“Effect”: “Allow”,
“Resource”: “*”
}
]
}

For a detailed pictorial depiction, do check out Appendix C that will take you through this.

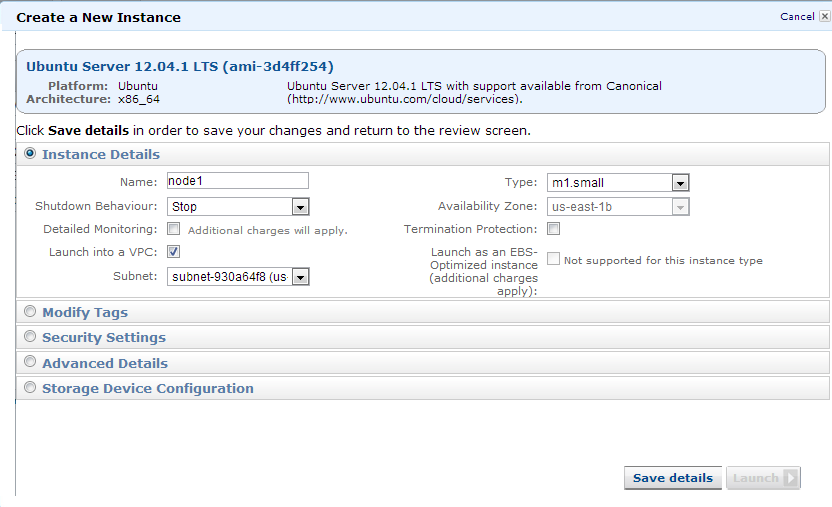
Step 3: Now comes the most important part – Getting your NAT instances ready.

It’s finally time to launch the two NAT (Linux Amazon EC2) instances into the VPC. For this, you could use the Amazon Linux AMI or anything else of your choice. All you need to be careful about is to launch them into the 2 public subnets of your VPC accurately and use the security group and IAM roles that you previously created.

For a NAT instance to perform network address translation, you got to disable source/destination checking on each of those instances. Once you do this, create 2 EIPs or if you already have EIPs that are free, associate each of the NAT instances with EIPs.

Cool! Now you have your NAT instances all set and ready.

For those who are not sure how to go about it, we have Appendix D for you. Go through it and you will do this in a jiffy.

Next comes the process of actually designating your subnets as private and public.

Step 4: Creating and associating route tables with your subnets.

Now that your Amazon EC2 NAT instances are configured with EIPs, you can create route tables and rules for the private subnets to send Internet-bound traffic through these NAT instances.

When you used the wizard to create your VPC, by default your subnets are shunned outbound internet access except for the one subnet that was automatically public (as you chose “VPC with one public subnet only”).

For your VPC’s private subnets to reach the Internet, route their traffic through your NAT instances in the public subnets. And for the other subnet that you want as public, associate it with the internet gateway that you have for your VPC.

Don’t hesitate to have a look at Appendix E for a step by step procedure to get done with route table creation.

If you are done, rejoice as now you have almost come to the end of it. Now all you need to do is download and install. That’s quite easy ain’t it?

Step 5: Download this PDF file to configure your instances with the shell script.

Follow instructions in Script.pdf and you are done with configuring HA for NAT instances in your VPC

Congratulations! You now have successfully provided your VPC with 2 NAT instances and have leveraged bidirectional monitoring between them to implement a high availability (HA) failover solution for network address translation (NAT).

There are no rules for architecture for castles in the cloud”.

So set your imagination ablaze and Stay tuned to a lot more from us!

Links

Appendix A- Creation of an Amazon VPC

Appendix B-Creating a Security Group for the NAT instances

Appendix C-Creating an IAM role for the NAT instance

Appendix D-Getting your NAT instances ready

Appendix E-Creating routing tables for the VPC

Script.pdf- The script for configuration

Reference

http://aws.amazon.com/articles/2781451301784570

Extending AWS NAT instance utilization – Part 1


For those of us who have been through setting up VPC(Virtual Private Cloud) in AWS know the need to have a NAT instance running. Since we have to keep this instance running as long we need the easy internet access from instances running in Private subnets, had always wondered how else can this instance be utilized. In reality these NAT instance are doing a outward Port Address Translation from internal Private Subnet instances to external Internet.

Typical NAT Server in AWS:

NAT-Server

NAT-Server-1

While, there are those who may argue that the NAT instance better be left alone, we believe there are ways to extend the abilities without noticeable impact of the primary utility. Typically, NAT instance that is provisioned using AWS wizard allows you to choose between small / medium instance types. After providing for the need for the Internet access for your private subnet instances (read in most typical use cases), there is enough time cycles which we can take advantage off.

Note: In addition to above, as we know NAT instance will have an Elastic IP assigned (VPC type), which is a scarce resource (limited to 5 by default, and you need to request for more to Amazon). This gives one more reason to utilize an instance with EIP(Elastic IP) to best use.

Let us see a few of them which we were able to successfully harness, to our clients and for our needs here at CloudKinetics.

Extension-1: PAT (Inward Tunnel): enable access to specific port – instance in Private subnet from Internet

At first it seems appalling to have a direct access to an instance running in Private subnet from internet (as the very purpose of Private subnet is to avoid direct access from internet), it is not uncommon to this scenario, when you have VPC but no VPN configured and say a DB Server running in the private subnet. 

In the above scenario, if we need to access the DB Server(in Private Subnet with in VPC) from a Toad or other SQL clients from the enterprise / home network to quickly do a sql query, then we need a direct access. Alternative would be to run such clients from with in another instance with in the VPC. Nevertheless it is always convenient to run those from our own laptop / desktop from work. Though we want to enable to this access, but need to ensure it is restricted to only this instance and to a specific port and from a specific external IP(or range of IPs).

Let us assume we have an Oracle on RHEL running in our VPC in the Private Subnet, which is primarily accessed by other Application instance inside VPC.  If you have need to run some porting scripts or intializing DDL scripts from the client, need to have access to Oracle running in Private subnet (say 10.0.1.*) open port 1532 @ 10.0.1.123 from Enterprise public IP (xxx.xxx.xxx.110)

It is a three-step process,

a) Getting the IPTABLES update command ready

b) Updating the IPTABLES service in NAT configuration to ensure retaining configuration after restart.

c) Open the required port in the NAT Server SecurityGroup

By Default the AWS NAT ami implements the Outward PAT ability through IPTABLES service. The configurations to the service are updated on startup from /usr/local/sbin/configure-pat.sh

Edit this file as root and find the line as below

/sbin/iptables -t nat -A POSTROUTING -o eth0 -s ${VPC_CIDR_RANGE} -j MASQUERADE

Update to look as below to include the additional two lines for allowing the access from external internet to Db Server (10.0.1.123: 1532).

 /sbin/iptables -t nat -A POSTROUTING -o eth0 -s ${VPC_CIDR_RANGE} -j MASQUERADE && \
 /sbin/iptables -A PREROUTING -t nat -i eth0 -p tcp --dport 51532 -j DNAT --to 10.0.1.123:1532 && \
 /sbin/iptables -A FORWARD -p tcp -d 10.0.1.123 --dport 1532 -j ACCEPT

Please take care to add the “&& \” to the existing MASQUERADE command line.

NAT-Server-PAT

Now, time to reboot the server. With the above step we have configured the port 51532 in the NAT Server to be open to Internet, which in turn will do a Port Address Translation to send it to port 1532 of the local VPC Private subnet instance 10.0.1.123.

To restrict and open the access from our Enterprise IP Address to the NAT Server on port 51352, need to configure the NATServerGroup (or the Security Group assigned to NAT Server) as below.

NAT-Securitygroup

That is it, we have now enabled the NATServer to do an inward Port Address Translation. We can extend this to other instances / ports as required.  Also the above steps can be automated by using simple shell scripts.

Final-SecurityGroup

Reference:

IP Tables: http://www.linuxhomenetworking.com/wiki/index.php/Quick_HOWTO_:_Ch14_:_Linux_Firewalls_Using_iptables

In the next parts we will cover other possible extensions, as listed below:

Part 2 on Extension-2: NFS (Network File Storage) – Shared drive for VPC instances (and Enterprise)

Part 3 on Extension-3: SFTP Server for File upload

Hadoop Cluster using Whirr – BYON in AWS VPC – Part 2


In this article series we will look at the steps in creating a Whirr base instance which will be used to launch the Hadoop cluster over your custom created instances  ”using AWS VPC – BYON(Bring Your Own Network)”, ie., on pre-setup machine instances in AWS VPC.

In this article we will focus on how to install whirr in the Whirr Based & how to launch the hadoop cluster 

As discussed in the Part 1, we should have a whirr base with the whirr tar deflated in the Ubuntu home directory.

Step1: Next step is the log on to get whirr in path.

You can use other ways of adding to path as well, here we will create “Soft link” to the whirr file into /usr/bin

 $ sudo  ln –s /home/ubuntu/whirr-0.8.1/bin/whirr /usr/bin/whirr

Now enter

$ whirr version

whirr-version

This should return the Apache whirr & jclouds version.

Step2: Create a ssh key for hadoop cluster

Create a ssh key pair by using the below command. This should generate id_rsa and id_rsa.pub in the .ssh folder under the current user home (/home/Ubuntu/.ssh)

$ ssh-keygen -t rsa -P ''

ssh-keys

Step3: Next step is to launch the Amazon EC2 VPC instance for hadoop cluster

Recollect in the earlier article(Part 1) we had  defined 3 dns names and ip address for our hadoop clusters. We will launch a hadoop cluster with 1 master(jobtracker + namenode) with 2 workers (tasktracker + datanode).

So we need to launch 3 instances with the desired machine size into the subnet of the VPC where the ‘whirr base’ instance is running. We will use the same template of Ubuntu 12.04.1 available as standard with Amazon.

Note: Use the keypair generated in the above step as the keypair for launching these instances. Meaning import this key into your aws account before you start launching your instances

Launch-node-1

Launch-node-2

Launch-node-3

Launch-node-4

Step4: Configure each node with the DNS name and DNS server

Access each of the instance via ssh with the ssh keys and make the following changes each one of them.

$ sudo vi /etc/dhcp/dhcpclient.conf

Make the changes to update the domain-name as ‘ck.local’ and the domain-name-servers 10.0.1.80 (nameserver ip address)

node-conf1

Now update the hostname to the corresponding hostname configured in the dns server for each of the ipaddress. Note: DNS names used should be exactly the same as used against the corresponding ip address of the instance as configured in the DNS Server. (refer Part1)

$ sudo vi /etc/hostname

Delete the current name entry and update as node1 for instance with ip address 10.0.1.220, one with 10.0.1.221 as node2 and that with 10.0.1.222 as node3. Update save the file and reboot.

$ sudo reboot

Now we are ready for launch of hadoop cluster.

Step5: Configure Whirr for BYON & CDH and launch hadoop cluster

Now that we have all the instances ready for hadoop deployment, it is time to configure the whirr for BYON(bring your own network). Our network as we recollect is as follows

3 instances with Ubuntu 12.04, 64 bit, default sudo user name: ‘ubuntu’

Copy two configuration files from existing whirr installation under ‘recipes’ folder

$ cp whirr-0.8.1/recipes/hadoop.properties ~/cdh-whirr.properties

$ cp whirr-0.8.1/recipes/nodes-byon.yaml ~/cdh-byon.yaml

Now edit the cdh-whirr.properties as below, change the following

whirr.cluster-name=cdh-hadoop

# Change the name of cluster admin user
#whirr.cluster-user=${sys:user.name}
whirr.cluster-user=ubuntu

# Change the number of machines in the cluster here
whirr.instance-templates=1 hadoop-namenode+hadoop-jobtracker,2 hadoop-datanode+hadoop-tasktracker

whirr.hadoop.install-function=install_cdh_hadoop
whirr.hadoop-configure-function=configure_cdh_hadoop

whirr.service-name=byon
whirr.provider=byon
jclouds.byon.endpoint=file:///home/ubuntu/cdh-byon.yaml

whirr-prop

Now edit and update the cdh-byon.yaml file for our network.

nodes:
    - id: ubuntu1
      hostname: 10.0.1.220
      os_arch: x86_64
      os_family: ubuntu
      os_description: ubuntu
      os_version: 12.04
      group: ubuntu
      username: ubuntu
      credential_url: file:///home/ubuntu/.ssh/id_rsa
    - id: ubuntu2
      hostname: 10.0.1.221
      os_arch: x86_64
      os_family: ubuntu
      os_description: ubuntu
      os_version: 12.04
      group: ubuntu
      username: ubuntu
      credential: file:///home/ubuntu/.ssh/id_rsa
    - id: ubuntu3
      hostname: 10.0.1.222
      os_arch: x86_64
      os_family: ubuntu
      os_description: ubuntu
      os_version: 12.04
      group: ubuntu
      username: ubuntu
      credential: file:///home/ubuntu/.ssh/id_rsa

whirr-byon

That is it we are now ready for launching our cluster.

Step6: Launch CDH hadoop cluster through whirr

Execute the below command from /home/ubuntu as ubuntu user.

$ whirr launch-cluster --config cdh-whirr.properties

This will take time and finally you should get the confirmation message as below with the URL to access the Namenode status and JobTracker status as below.

whirr-cluster-launched

With that we have the CDH hadoop cluster launched via Whirr using BYON into Amazon AWS VPC.

Job Tracker

hadoop-jobtracker

Name Node

hadoop-namenode

TaskTracker

hadoop-tasktracker

Note: Now you can stop, start instances as need be for any development / testing needs of hadoop cluster.

References:

Part 1: https://cloudkinetics.wordpress.com/2013/02/04/hadoop-cluster-using-whirr-byon-in-aws-vpc/

https://ccp.cloudera.com/display/CDHDOC/Whirr+Installation#WhirrInstallation-Destroyingacluster

https://github.com/jclouds/jclouds/tree/master/apis/byon

Hadoop Cluster using Whirr – BYON in AWS VPC – Part 1


In this article series we will look at the steps in creating a Whirr base instance which will be used to launch the Hadoop cluster over your custom created instances  “using AWS VPC – BYON(Bring Your Own Network)”, ie., on pre-setup machine instances in AWS VPC. In this article we will focus on how to create a Whirr base instance. 

Key challenge in getting a hadoop cluster through Whirr – BYON over Amazon AWS VPC, is that each instance in the Hadoop clusters should have a hostname which is traceable both by forward and reverse dns lookup in their network. Any AWS VPC instance is not assigned with any dns names(only ip address) and is not associated with a local dns.  So we will have to get a local dns server setup in the Whirr base instance and then setup Whirr with Open JDK. In the local dns we will configure the dns names and ip address of instances which we will use for hadoop cluster launch.

Creating Whirr base template with ability to launch BYON.

To start with launch default 12.04.1 ubuntu instance (small)

$ sudo su

Step1: Install DNS Server: bind9

$ apt-get install bind9
$ cd /etc/bind9

Step2: Forward dns lookup setup: db.<dns domain>

Make decision on your local dns name say, “ck.local”. Current machine will be the SOA & NameServer(NS) for the domain. Calling current machine (hostname) as “dc”, meaning dc.ck.local.

Make a copy of the db.local file as db.ck.local

$ cp db.local db.ck.local

Edit and update as below:

With SOA as dc.ck.local & administrator as root.ck.local (instead of root@ck.local)

I wanted to configure 3 more machine in dns other than the current dc.ck.local (10.0.1.80 in my case)

Make the others as node1.ck.local(10.0.1.220), node2.ck.local(10.0.1.221), node3.ck.local(10.0.1.222)

db_ck_local

Step3: Reverse Lookup db.<ip address range in reverse>

Now we need to create reverse lookup, copy the db.0 and name it as db.1.0.10 (where all my machines are going to be in the ip ranges of 10.0.1.* and update as below.

db_1_0_10

Step 4: Include in Name configuration

Next step is to update the bind name configuration to include all these files.

$ vi named.conf.default-zones

update as below, to include both the db.ck.local (instead of the db.local) & update a new entry for db.1.0.10

named_local

Step5: Update External DNS forwarder

Now the next update, is to configure the forwarder for the external dns names to the (default dns server for VPC 10.0.0.2)

$ vi named.conf.options

named_conf

Step6: Update the current machine hostname & nameserver configurations.

In this Ubuntu it is indirectly controlled by dhcp configuration and editing /etc/resolv.conf is the not the right idea.

$ vi /etc/dhcp/dhclient.conf

Whirr-BYON

Update the set host-name to hostname and then uncomment the “supersede domain-name” and update to the chosen domain name, then uncomment the prepend domain-name-servers and update it with the current machine as the dns server “10.0.1.80” (I have updated the vpc dns server[10.0.0.2] which is not really required)

Now make sure the bind9 is part of startup service. I did that using

$ chkconfig bind9 on

If you don’t have the chkconfig install first using apt-get install chkconfig.

$ reboot

Now you have a DNS Server ready.

Step7: Next Step is to get the OpenJDK, Whirr downloaded as below.

Whirr:

$ wget http://apache.techartifact.com/mirror/whirr/stable/whirr-0.8.1.tar.gz

$ tar –xzf whirr-0.8.1.tar.gz

OpenJDK:

Follow the instructions as in

http://www.mkyong.com/java/how-to-install-java-jdk-on-ubuntu-linux/

That is it you are now ready with the Whirr base. Create a Amazon Machine Image(AMI) out of this and should be useful to get a whirr base instance on demand. Next document will give inputs on how to launch a Hadoop cluster via Whirr – BYON service provider.

Reference:

http://aws.amazon.com/vpc

http://whirr.apache.org